Easy DIY Metal-Look Ornaments Made From an Empty Cereal Box
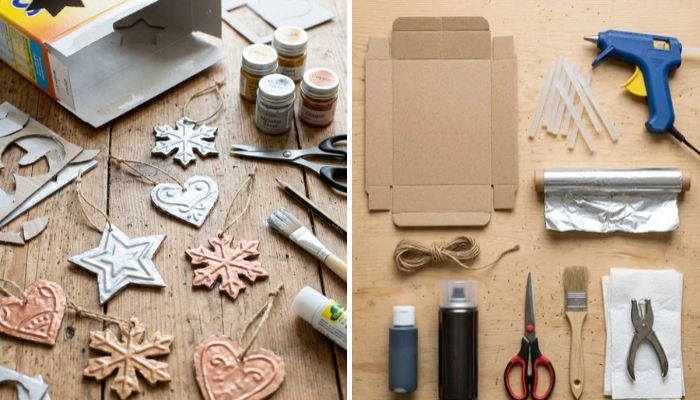
Some DIY projects look simple, but the finished results can be surprisingly beautiful. This craft is a perfect example. An empty cereal box, a hot glue gun, and a little aluminum foil can turn into lovely decorative stars.
This is a fun and affordable way to reuse old cardboard instead of throwing it away. You only need a few basic craft supplies, most of which are easy to find at home or in local craft stores.
If you enjoy DIY home décor, recycled crafts, and handmade decorations, this project is a great choice. The finished stars have a beautiful vintage metal look. You can use them for Christmas decorations, gift wrapping, holiday wreaths, or other home decorating projects.
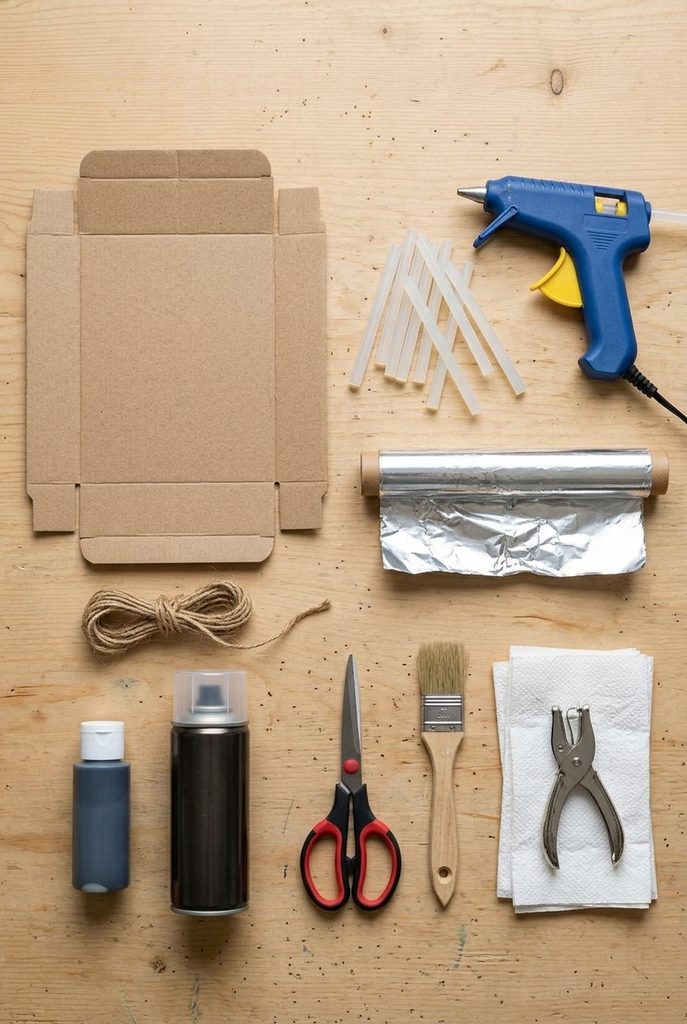
Materials You Will Need
Before starting, collect all the supplies you need. Most of these items are affordable and can be used for other DIY projects too.
- 1 empty cereal box, opened flat
- 10 standard hot glue sticks
- 1 hot glue gun
- 1 roll of heavy-duty aluminum foil (at least 25 feet)
- 1 small bottle of black acrylic paint (about 2 ounces)
- 1 can of clear spray sealer (10–12 ounces)
- 3 yards of jute twine, cut into 9-inch pieces
- 1 pair of scissors
- 2 paper towels
- 1 soft brush (1–2 inches wide)
- 1 hole punch
These simple materials are all you need to make your own decorative stars without spending much money.
How to Make Metal-Look Stars From an Empty Cereal Box
Follow these easy steps to make beautiful handmade ornaments for your home.
1. Get the Cereal Box Ready
Cut along the folded edges of the cereal box and open it flat. Turn it over so the plain gray side faces up. Remove the top and bottom flaps. Make sure the cardboard is flat and ready to use.
2. Add Hot Glue Designs
Heat your hot glue gun. Start making loose lines, circles, and swirls across the cardboard. Let some lines cross each other to create a raised design. Cover most of the surface, but leave a few small gaps between the glue lines.
3. Draw and Cut the Stars
Let the hot glue cool completely. Draw star shapes on the cardboard, about 3 to 5 inches wide. Carefully cut out each star with scissors. Try to keep the edges and points neat.
4. Cover the Stars With Aluminum Foil
Cut pieces of aluminum foil large enough to cover each star. Leave about 1 inch of extra foil around the edges. Place the foil on a flat surface with the shiny side facing down. Put the cardboard star on top with the glue design facing the foil.
5. Press the Foil Into the Design
Gently press the foil over the cardboard with your fingers. Use a folded paper towel to push it into the raised glue lines. Start from the middle and slowly move toward the edges. Be careful not to tear the foil. This step helps the beautiful pattern show through.
6. Fold the Extra Foil
Turn the star over. Make small cuts in the extra foil around the corners and points. Fold the foil neatly over the back of the cardboard. Press the edges down so everything stays in place.
7. Make More Decorative Stars
Repeat the same steps with the remaining cardboard. One regular cereal box can usually make 8 to 12 stars, depending on their size. If you have extra cardboard, add more glue designs and cut out a few additional stars.
8. Add Black Paint for a Vintage Look
Put a little black acrylic paint on a paper towel or soft brush. Gently spread it over the foil-covered star. Let the paint reach the small spaces between the raised lines. Then wipe the top areas lightly so the silver foil stays visible. This creates an attractive old metal finish.
9. Attach the Hanging Strings
Wait until the paint is completely dry. Use a hole punch to make a small hole near the top of each star. Take a 9-inch piece of jute twine and pass it through the hole. Tie the two ends together to make a hanging loop.
10. Add a Clear Protective Coat
Take your finished stars outside or to a well-ventilated area. Spray a light coat of clear sealer over each one. Let the ornaments dry on a flat surface. You can add another thin coat if you want extra protection and a little shine. Always follow the instructions on the sealer.

Safety Tip: Be careful when using hot glue and scissors. Use spray sealer in a well-ventilated area and keep it away from flames and heat. Follow the safety directions on the product label.
Easy Variations and Helpful Tips
You can change this DIY craft in many ways. Try these simple ideas to make decorations that match your home and personal style.
1. Try Different Glue Designs
Use different patterns on your stars. You can make small circles, long lines, loops, and dots. Mixing these designs gives the ornaments more texture and makes each one look a little different.
2. Choose the Foil Finish You Like
You can use either side of the aluminum foil. The shiny side gives your stars a bright silver look. The dull side creates a softer, more natural vintage finish. Both options work well for this craft.
3. Make Stars in Different Sizes
Stars that are 4 to 5 inches wide are a good choice because their designs are easy to see. You can also make smaller stars for gift decorations or larger ones for your holiday home décor.
4. Make Other Shapes
You do not have to make stars every time. Try making hearts, snowflakes, or round ornaments using the same method. These different shapes can help you create a beautiful matching decoration set.
5. Use Black Paint in Small Amounts
You do not need a lot of black paint for this project. A small amount is enough to create the vintage metal look. Let the paint settle into the lower areas while keeping the raised parts silver. This makes the design stand out.
6. Find Creative Ways to Display Your Ornaments
There are many ways to use these handmade decorations around your home. Hang them on your Christmas tree, add them to a holiday wreath, or use them to decorate gift boxes. They also look lovely on garlands and seasonal table displays.
Final Thoughts
Making decorative stars from an empty cereal box is a fun way to reuse cardboard and create something beautiful. With a few simple supplies, you can make ornaments that look like vintage metal decorations.
This budget-friendly DIY project does not require expensive tools or special skills. You can make different shapes, try new patterns, and choose your favorite finish. Whether you use these stars for Christmas decorating, gift wrapping, or everyday home décor, they add a lovely handmade touch to your space.